| Drive Your Workforce to Achieve Greater Goals |
| Sign Up Now |
 |
| Drive Your Workforce to Achieve Greater Goals |
| Sign Up Now |
|
| Web | Mobile |
 |
TimeTec Attendance (TA) |
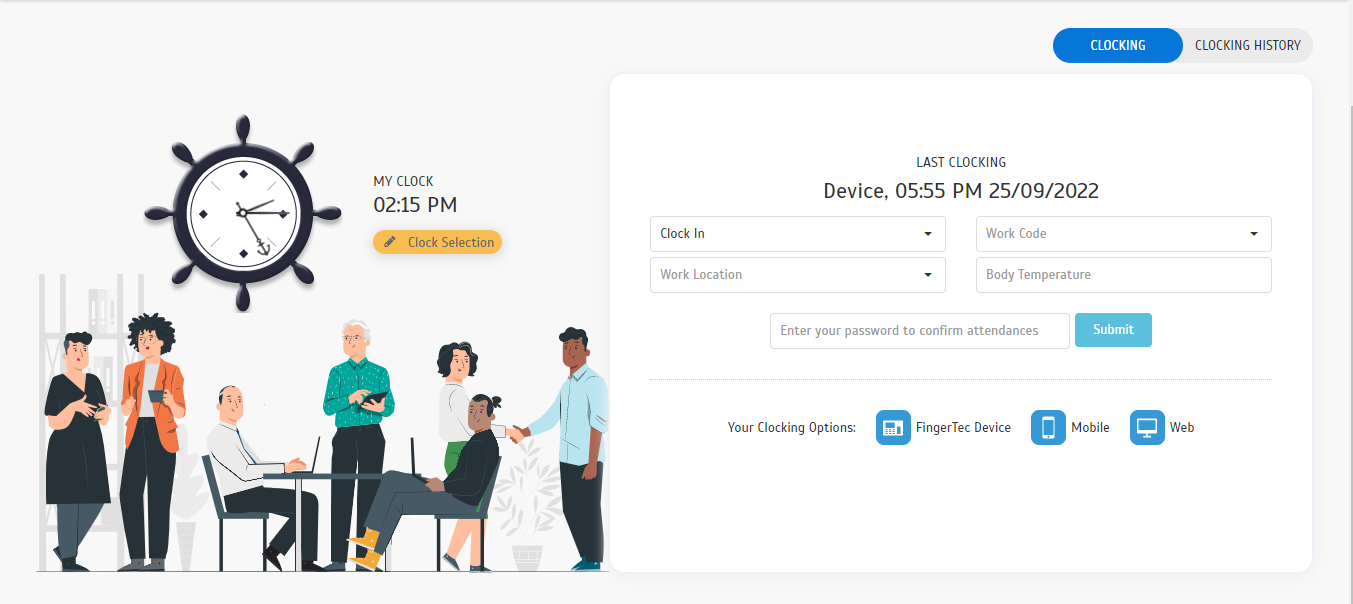
| In December, we updated the look for the user clocking page, in line with the design of TimeTec HR app. a. New User Clocking Page |
 |
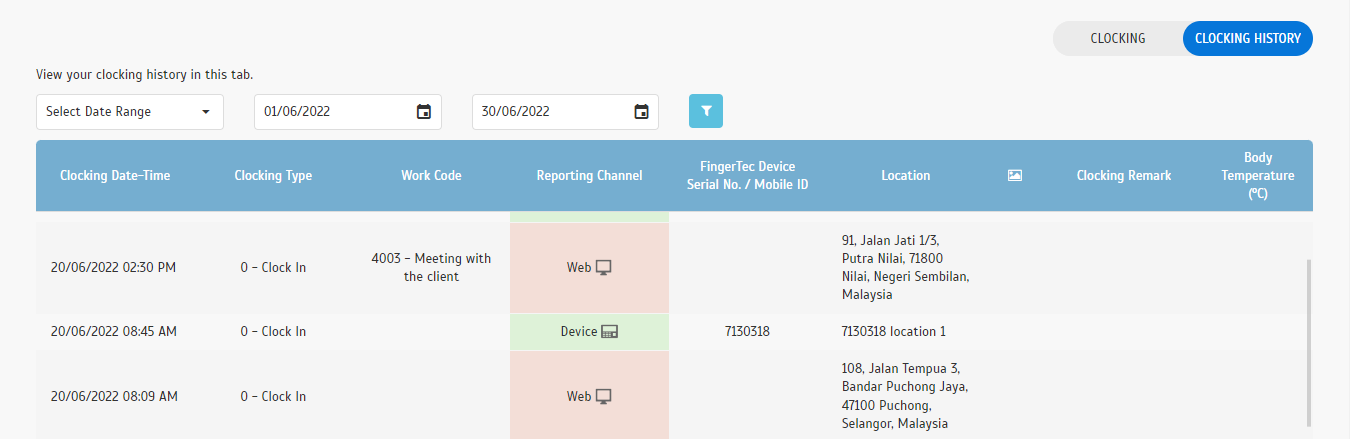
| b. History Clocking Page |
 |
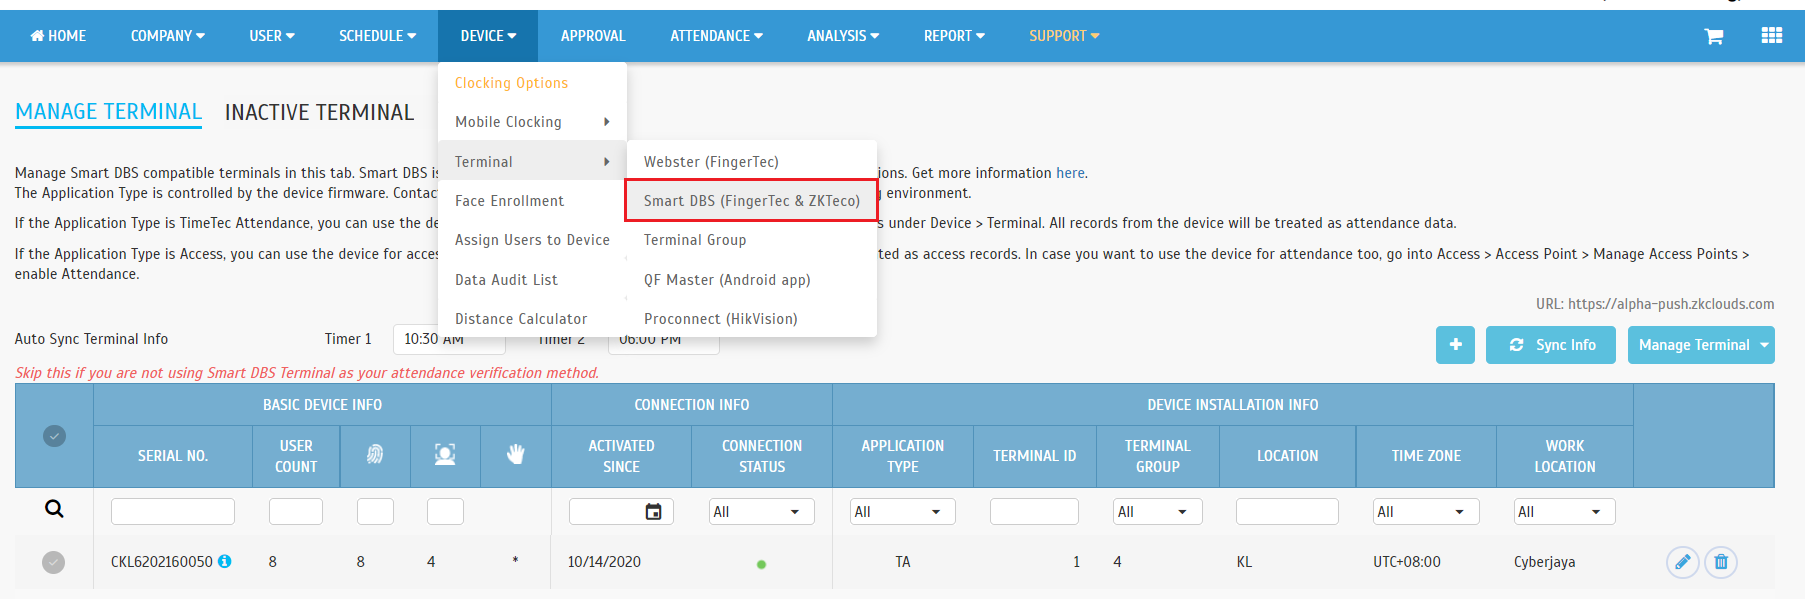
| The next update is for companies using Smart DBS compatible terminals with the TimeTec TA solution. This includes terminals such as Smart AC1/TD, ProFace X/TD or Face ID 5/TD. This month, we moved the Smart DBS listing to an individual page for a clearer navigation. You can now go to Device > Terminal > Smart DBS for terminal management. |
 |
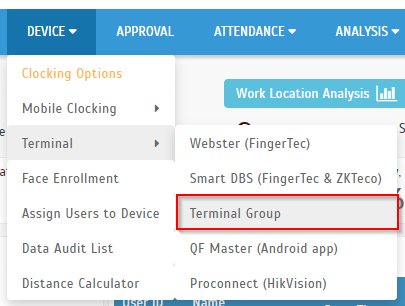
| Next update is also for companies that are using terminals in the system. The Terminal Group settings are useful for those that have terminals in various sites managed by different people. After assigning terminals into separate groups, you can assign different users with access to manage each group. Recently, we relocated the “Terminal Group” Page to Device > Terminal > Terminal Group. This is carved out as the group setting is a common setting that can be shared by Webster & Smart DBS devices. a. Device> Terminal > Terminal Group |
 |
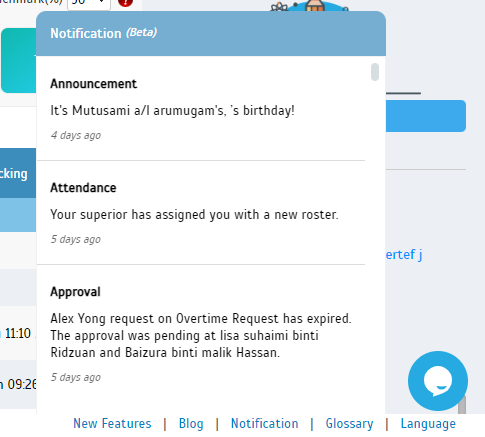
| User notifications are usually sent via TimeTec mobile app but recently we enhanced the notification function so you will also receive notifications in the web application. Hence, if you are solely using web login, you will not miss out on your notifications anymore. |
 |
 |
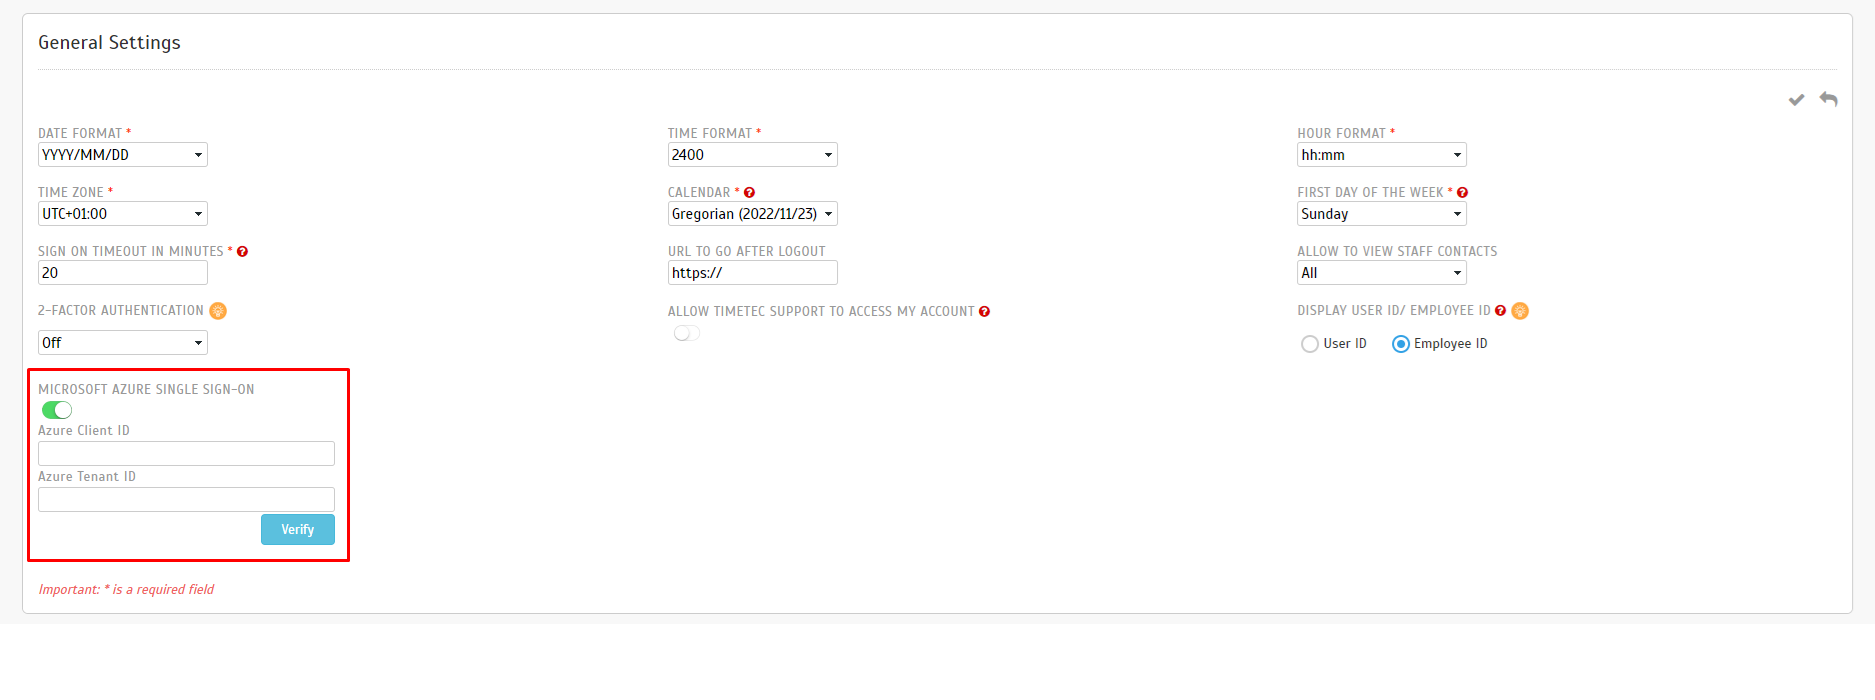
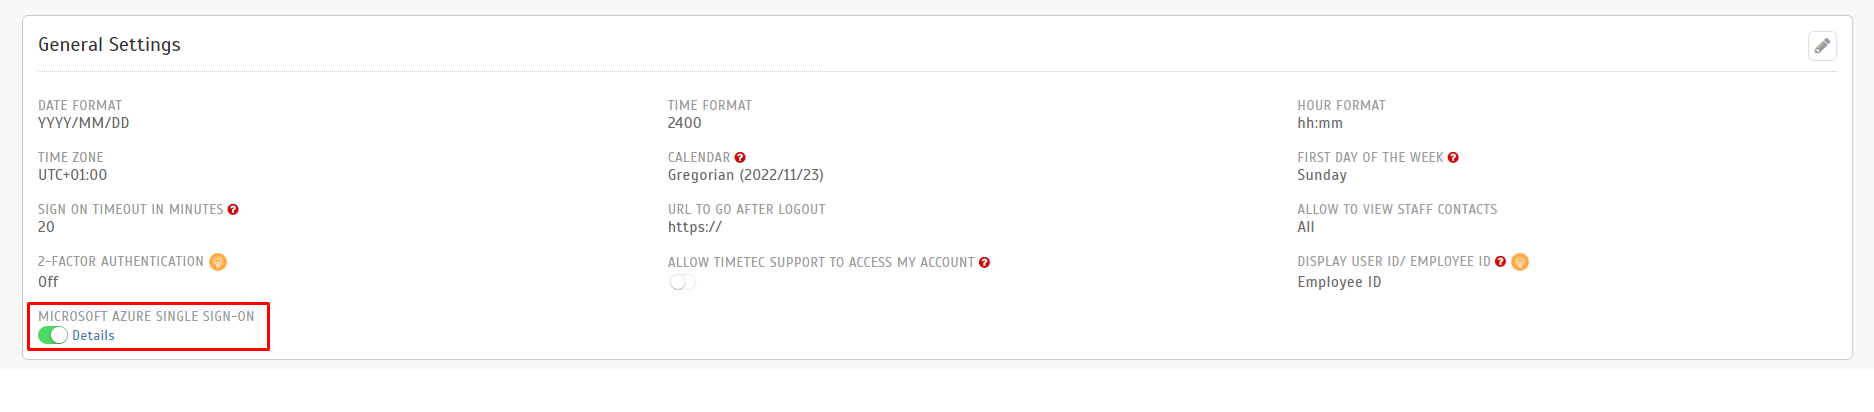
| In December, we added a new setting to support customers that are using Azure Active Directory (Azure AD) to manage user access and authentication for multiple independent software systems. One of the Azure AD features is Azure AD Single Sign-On (SSO) which allows users to use one set of credentials to log into multiple SaaS applications without needing to log into each individual application. Please refer to the sample screenshots below for further details: a. System Settings > General Settings – Added “Microsoft Azure Single Sign-On” Setting Users are able to turn on the Azure SSO settings. |
 |
 |
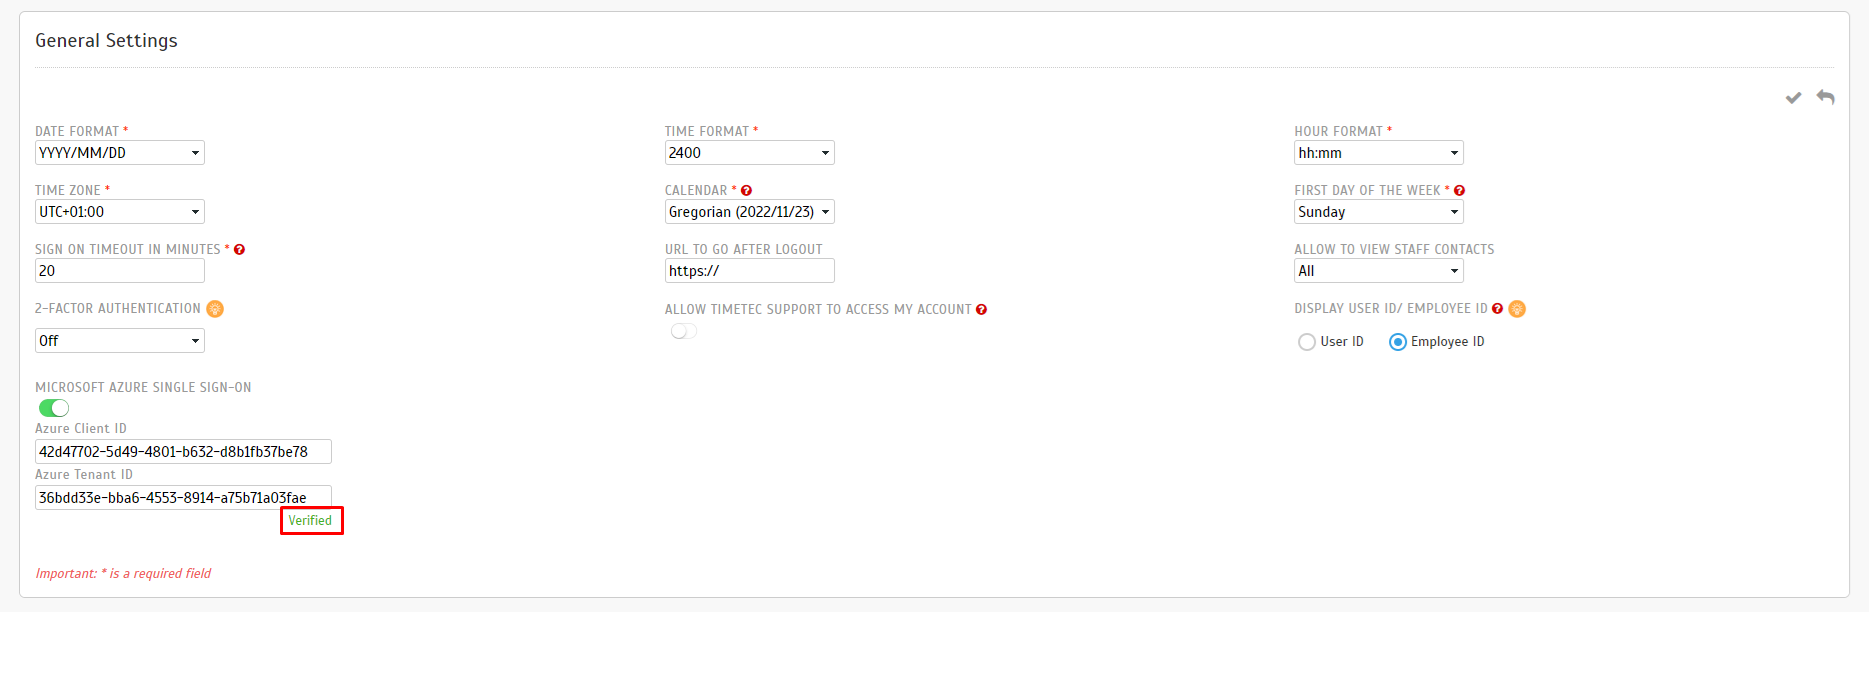
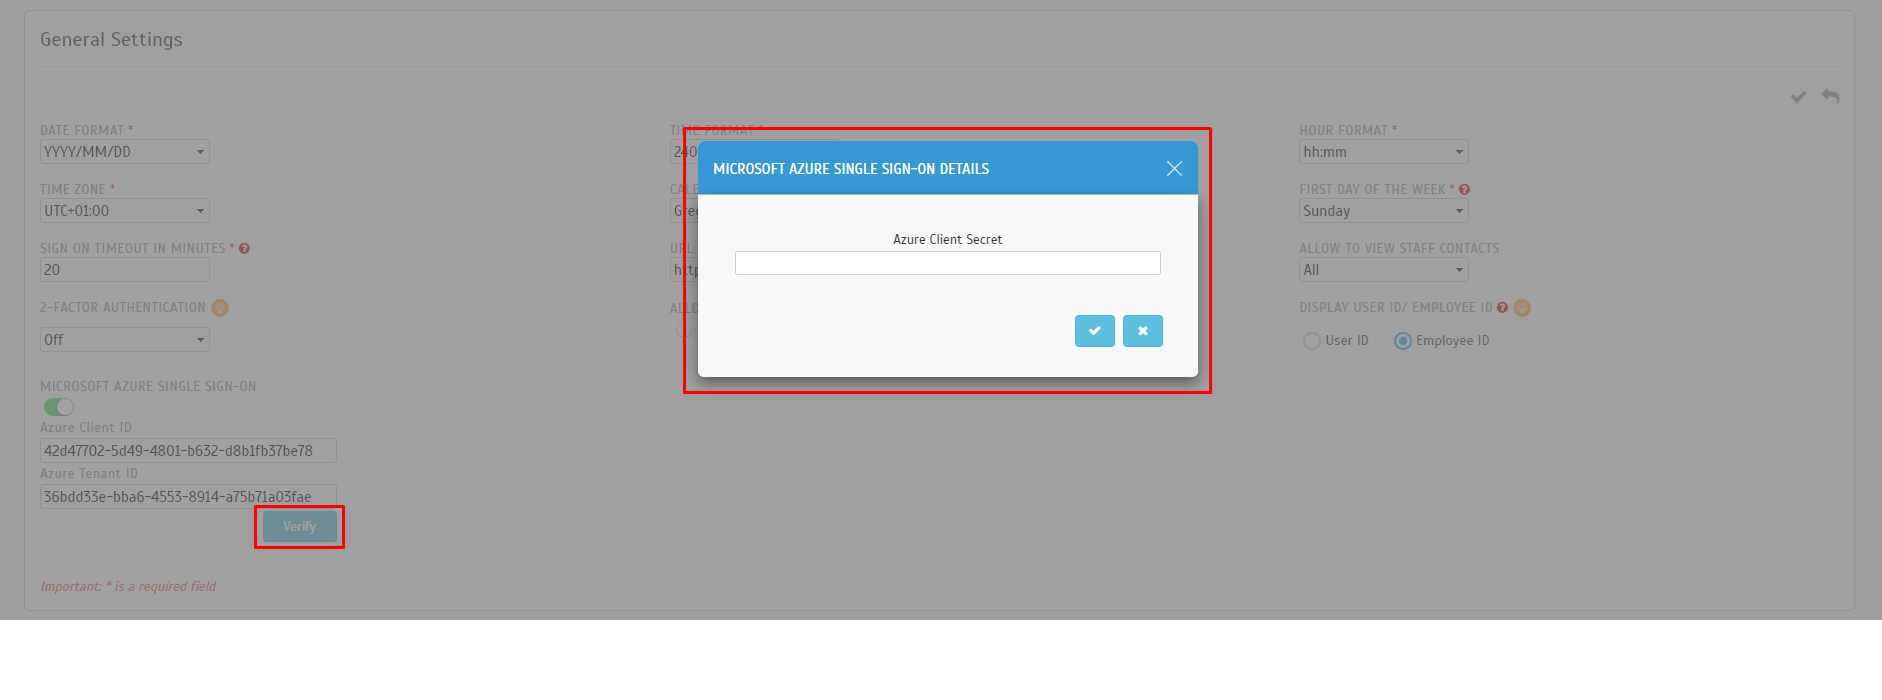
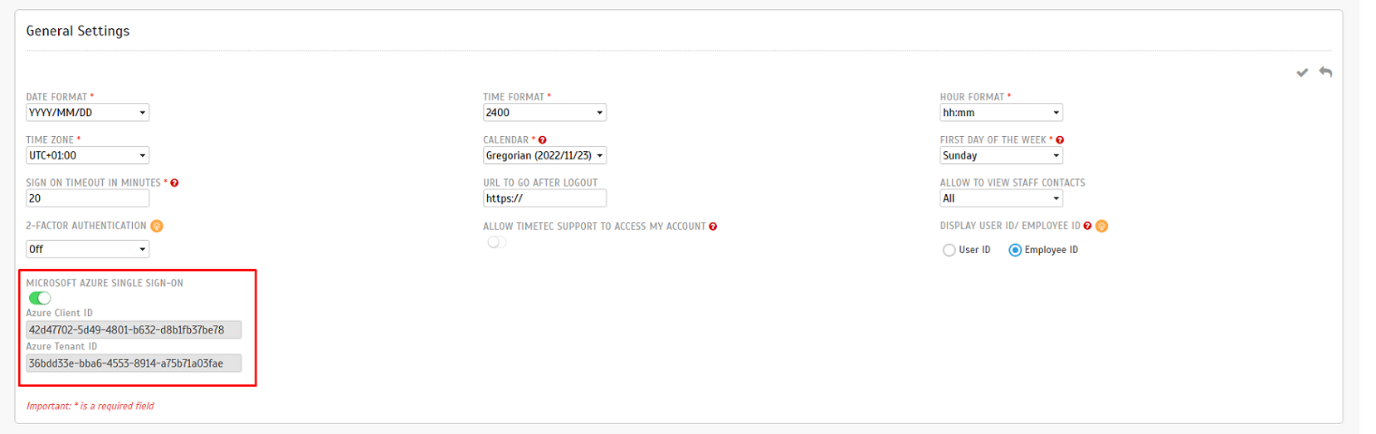
| b. “Microsoft Azure Single Sign-On” Setting – Enabled • When Azure SSO setting is turned on, users are required to fill up Azure Client ID and Azure Tenant ID. Once done, click the “Verify” button. • Next, fill up the Azure Client Secret to verify Azure Client ID and Azure Tenant ID. |
 |
 |
| c. “Microsoft Azure Single Sign-On” Setting (View Mode) Users can click `Details` hyperlink to view the Client ID and Tenant ID registered to the account. |
 |
 |
| d. “Microsoft Azure Single Sign-On” Setting (Edit Mode) - Not Allowed to Edit Azure SSO Admin is not allowed to edit Azure SSO after it is saved. |
 |
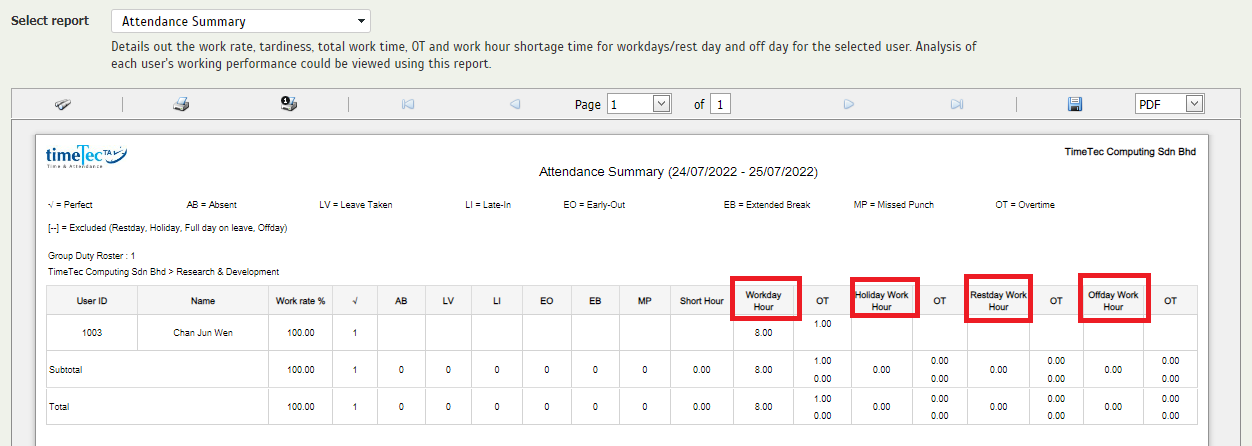
| This month, to improve performance, relevance and/or clarity, we made changes for 3 reports as listed below. a. Attendance Summary Report - Changed Column Headers |
 |
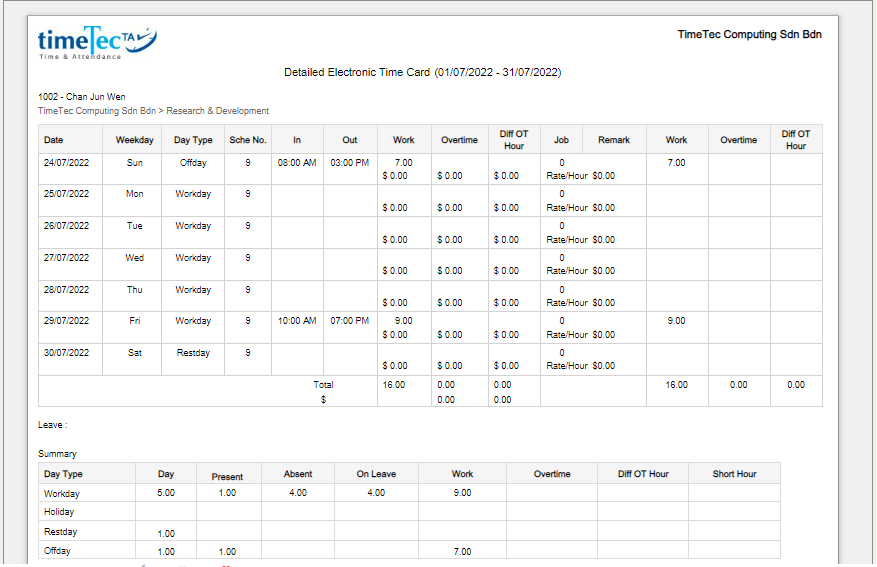
| b. Detailed Electronic Time Card Report – Revamped Report Format from Crystal to Xtrareport. |
 |
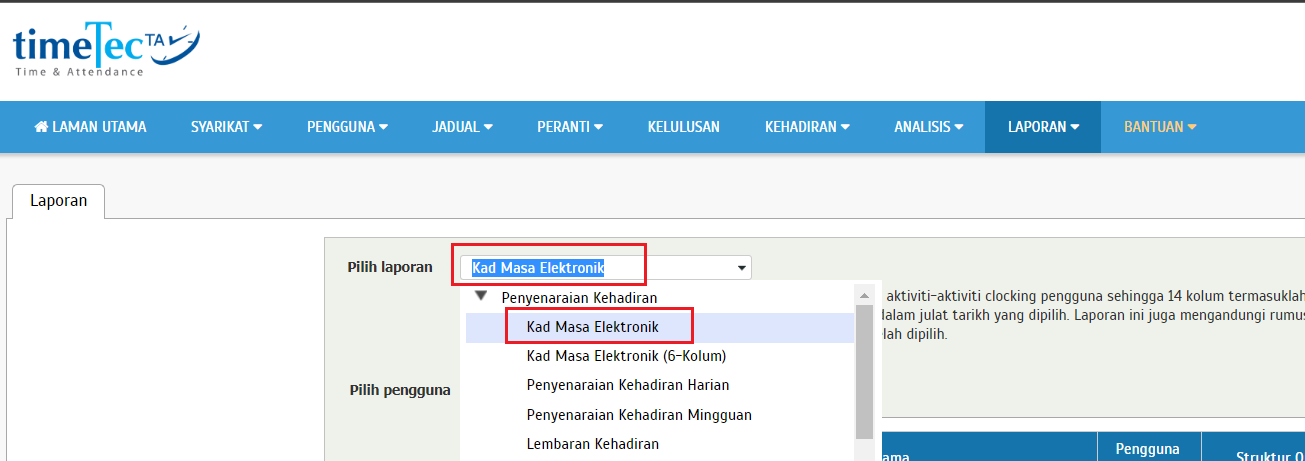
| c. Renamed Electronic Time Card Report in Malay Language Removed "(14-Kolum)" wording from Kad Masa Elektronik. Previous: |
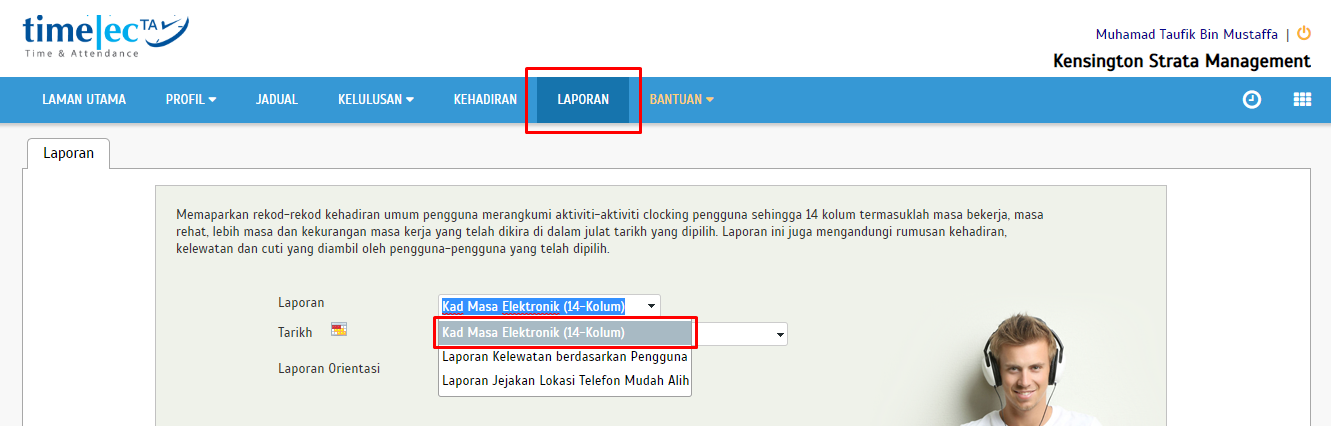 |
| Corrected: |
 |
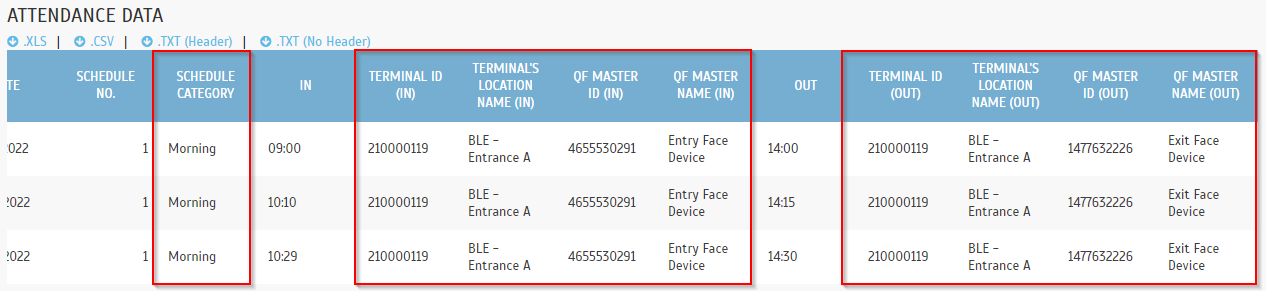
| To export the attendance data, the Admin needs to first configure the Detail Schema (Attendance > Export Attendance > Detail Schema) by specifying the required column arrangements for the export file. Following a customer’s request, we added new data fields to the selection available in the Detail Schema. a. Detail Schema – Added QF Master Terminal Details |
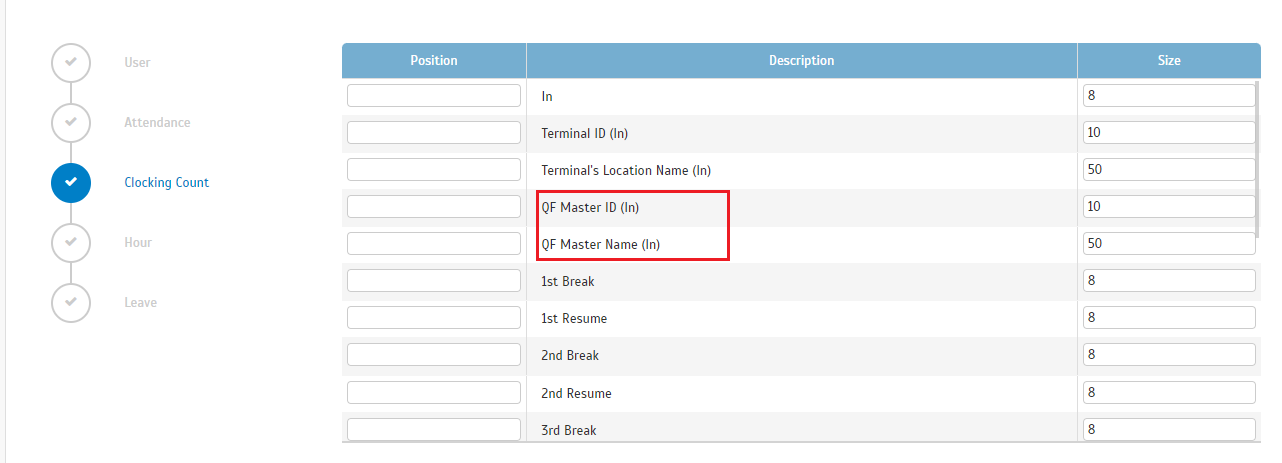 |
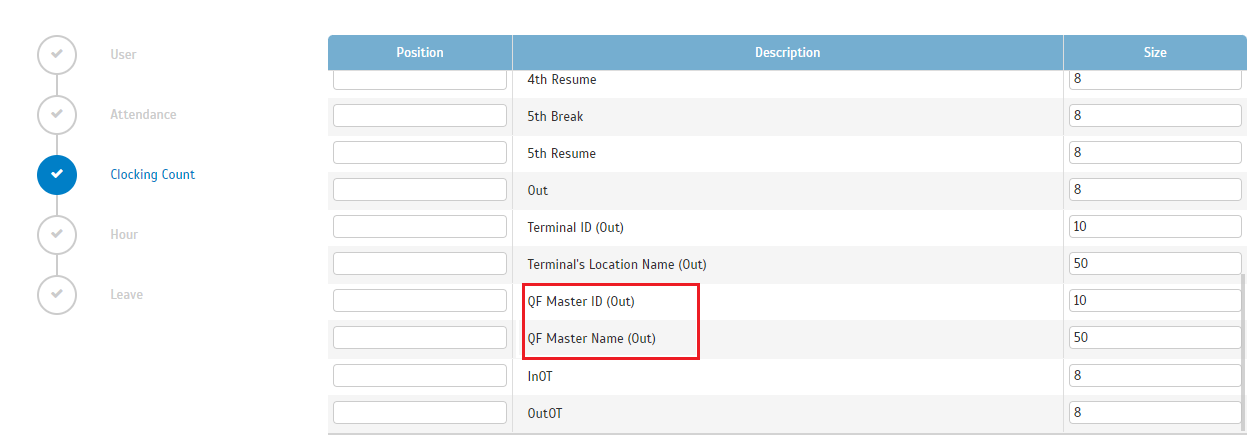 |
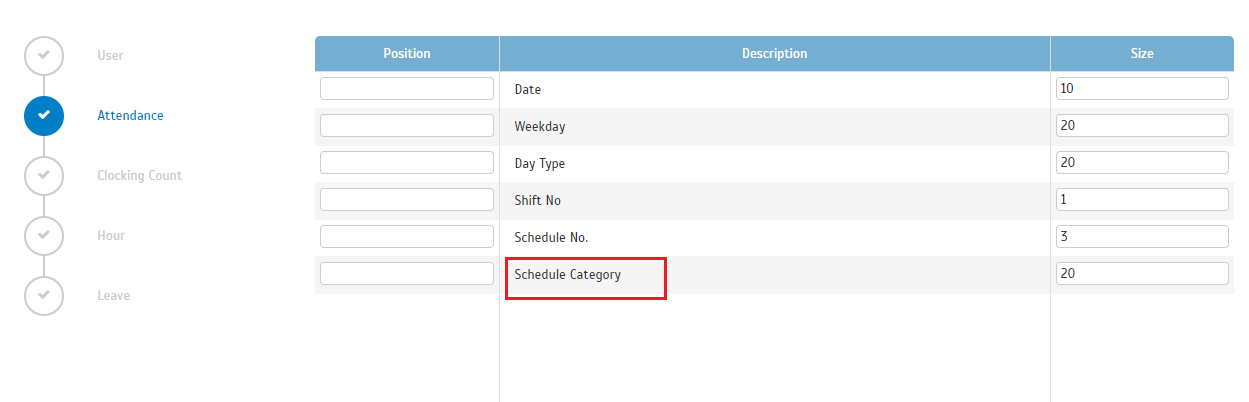
| b. Detail Schema – Added “Schedule Category” Field |
 |
| c. Example - Export Attendance Detail |
 |
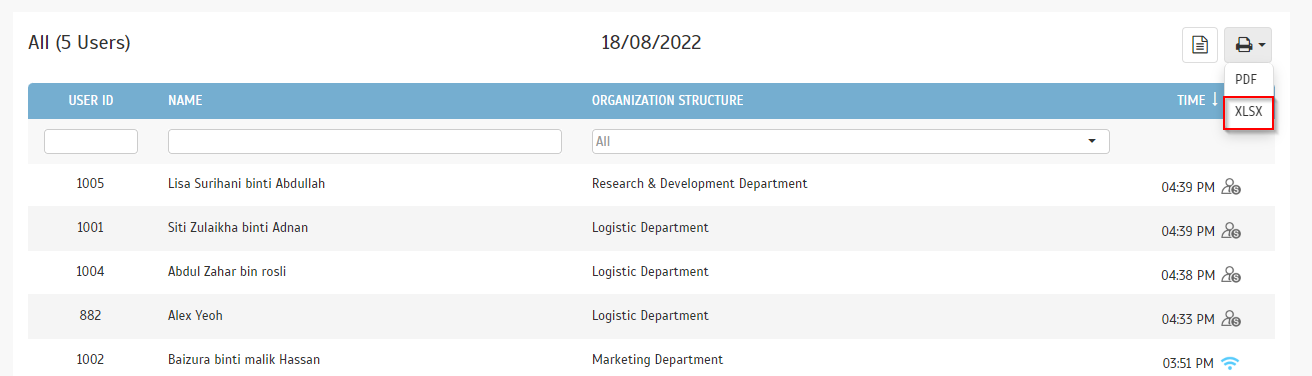
| Next update is on the ‘Work Location’ feature which enables organizations to categorise and track their staff whereabouts. Admin can create multiple work locations (e.g., HQ, Branch Office, Work from Home, etc.) and pair them with clocking methods/ devices. Mobile clocking users get to select their own daily location while other device clocking will be counted towards the pre-assigned location. Admins can then refer to the overview at the ‘Work Location Analysis’ page. In December, we added an option for exporting the data to an XLSX file. |
 |
 |
TimeTec Leave |
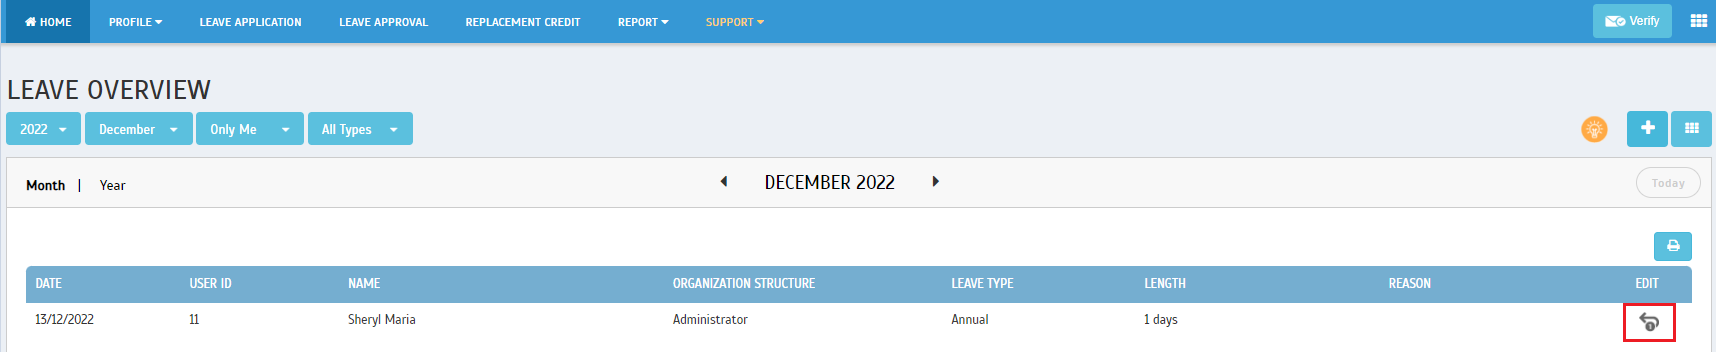
| At times, some users may need to cancel their originally approved leaves in the system if they are not able to take the time off or if they need to reschedule their leave dates. Such leave cancellation requests will be submitted for approvals but if it ever happens that a cancellation is mistakenly rejected by the Approver, then the user may face various administrative hurdles in pursuing the cancellation. Hence, to minimise such issues, we recently added an option for leave Amendment Request. After a Leave Cancellation Request is made and rejected, users still have a final recourse as they can now apply for an Amendment Request to the Approver. Approver can opt to accept this request, then the status reverts back to the Leave Cancellation Request stage, where Approver can then click to approve the Leave Cancellation Request. Refer to the sample screenshots below for further details: a. Leave Overview - User Request Amendment |
 |
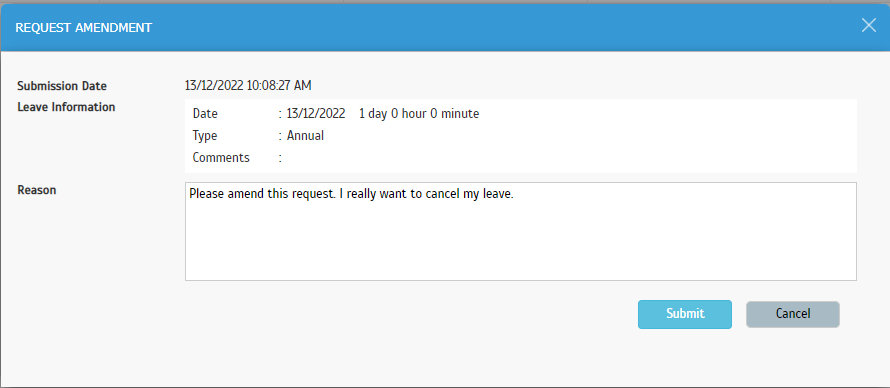
| b. Click “Request Amendment” Button - Request Amendment Form will Popup |
 |
| c. Leave Overview - After “Request Amendment” Submission After submission, list view calendar will display |
 |
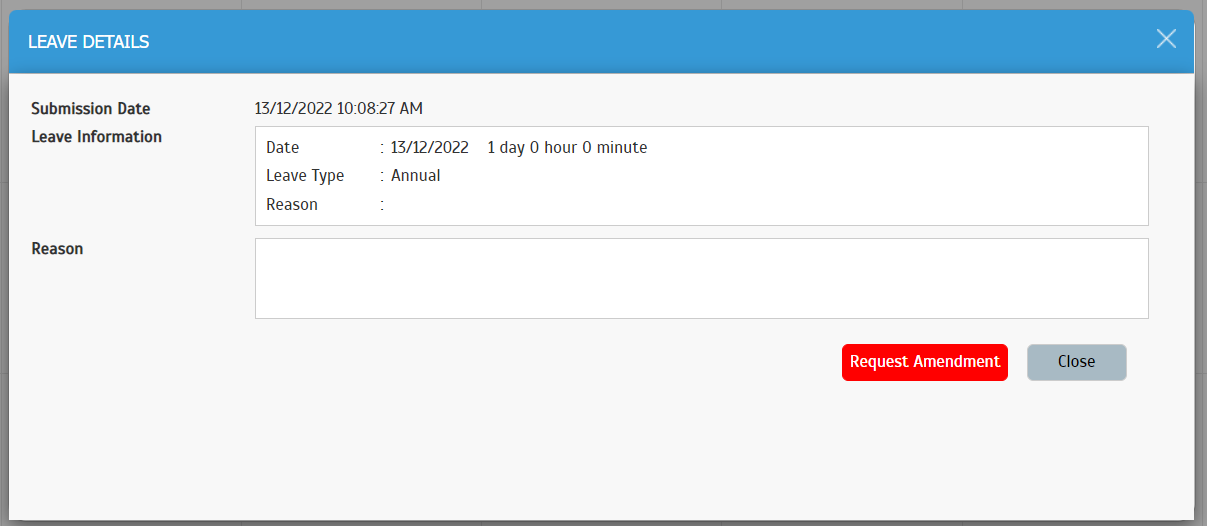
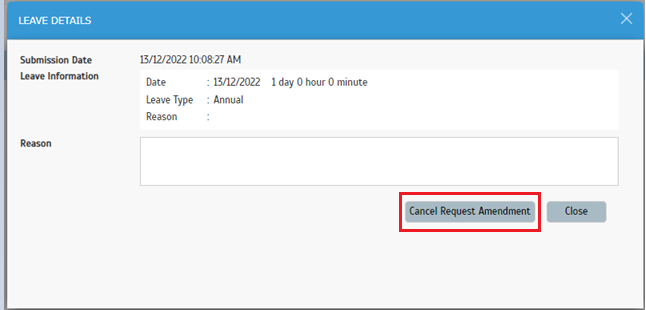
| d. Leave Details - After “Request Amendment” Submission When user clicks on Note: Users are only allowed to request amendment once. |
 |
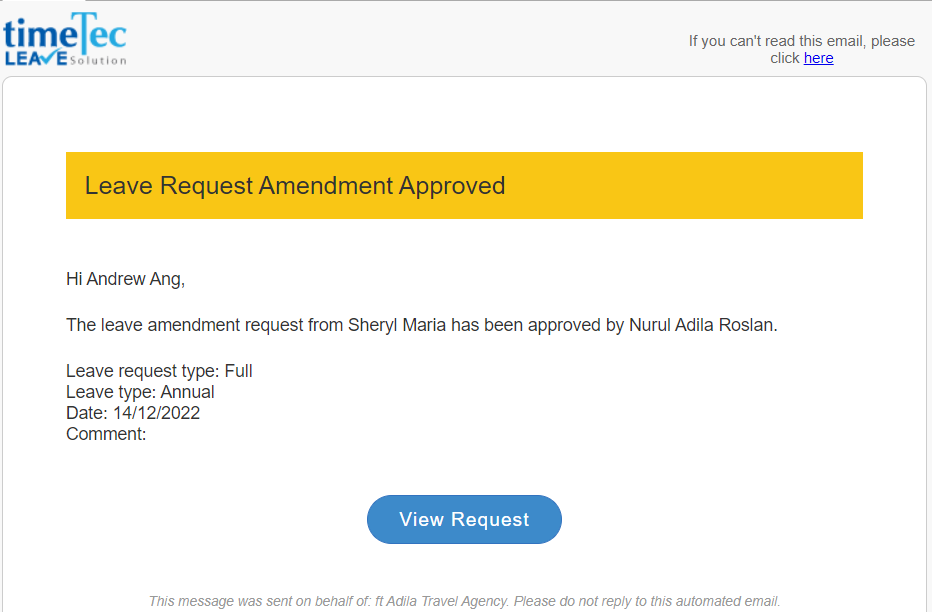
| e. Email & Notification is Sent to Approver |
 |
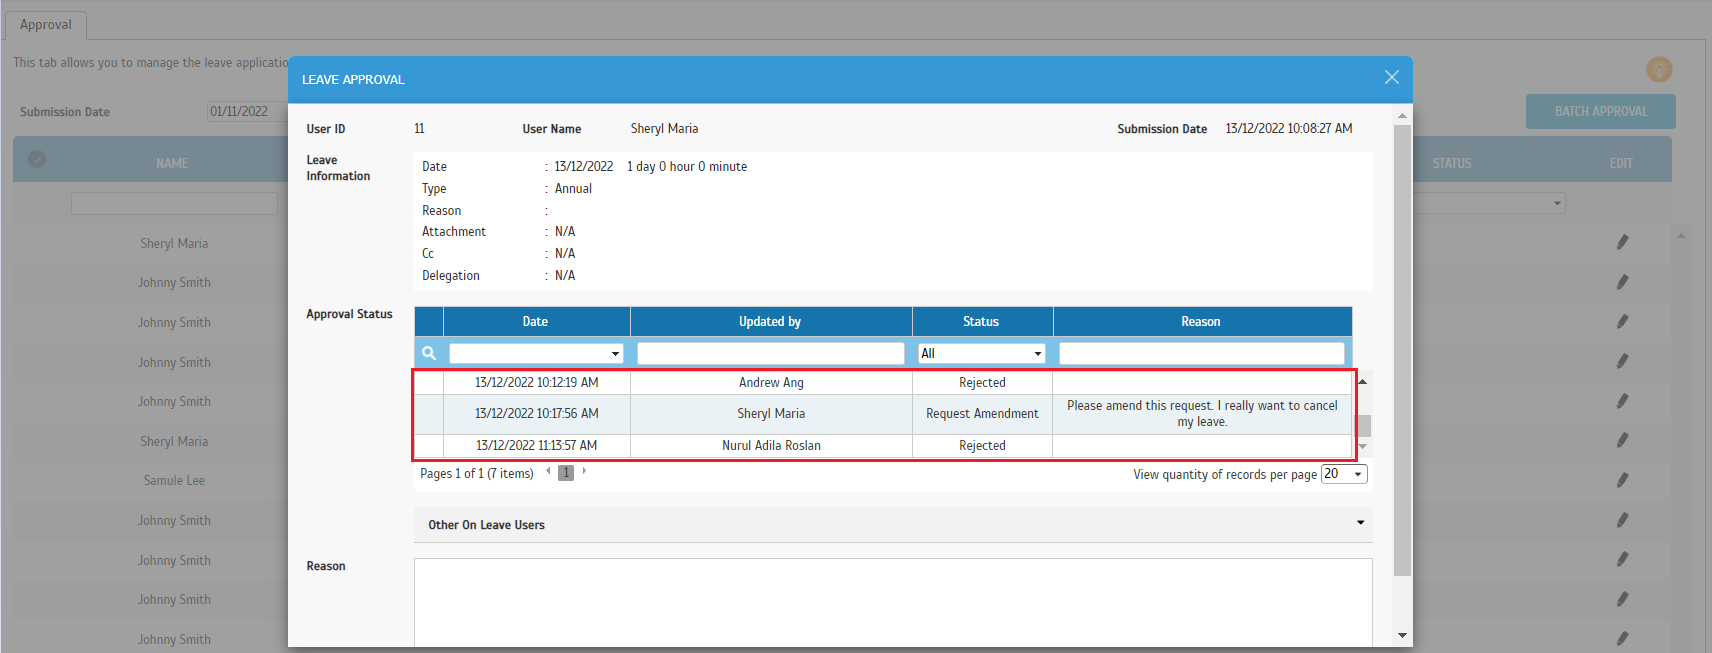
| f. Leave Approval – New “Request Amendment” Status The new status in the approval process is called ‘Request Amendment’. Any Approver is able to take action from this request. |
 |
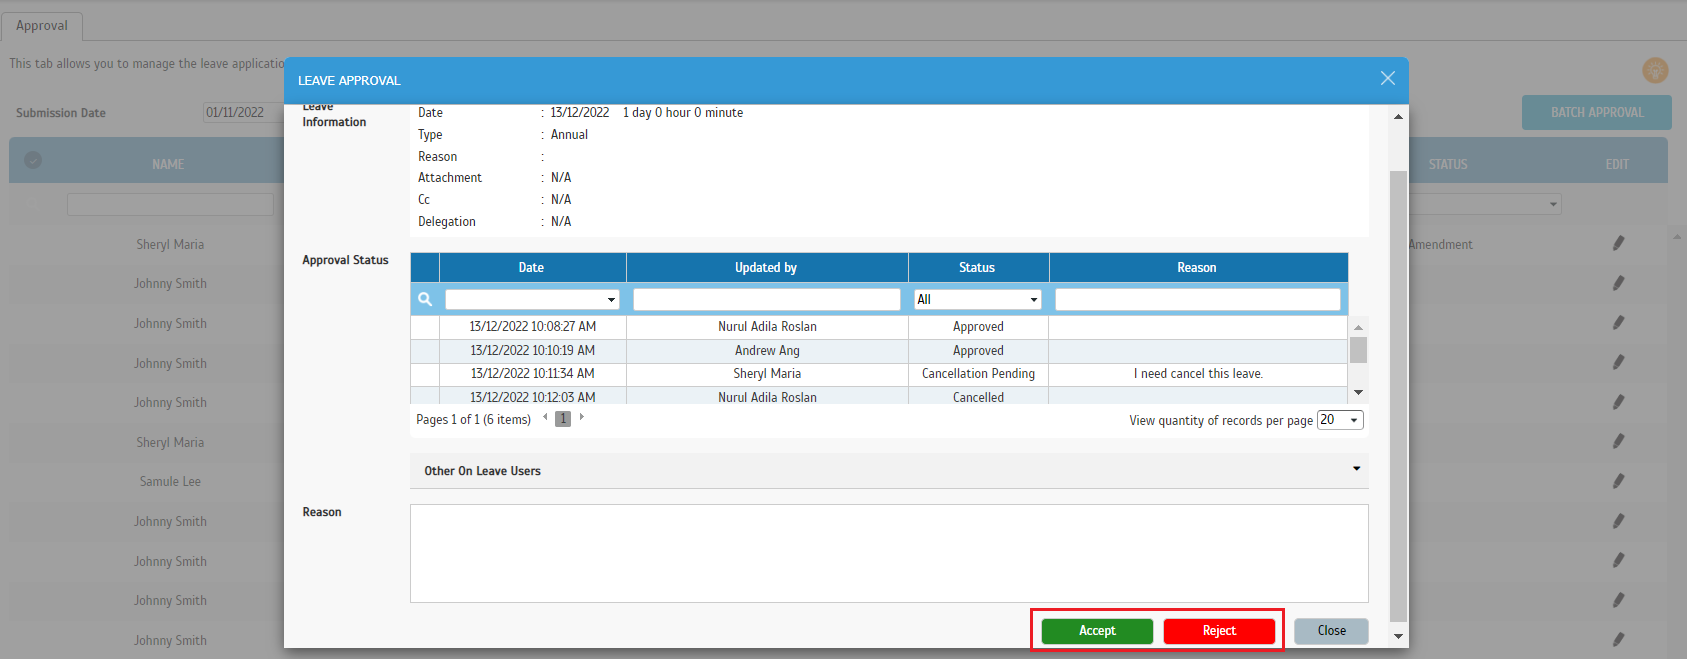
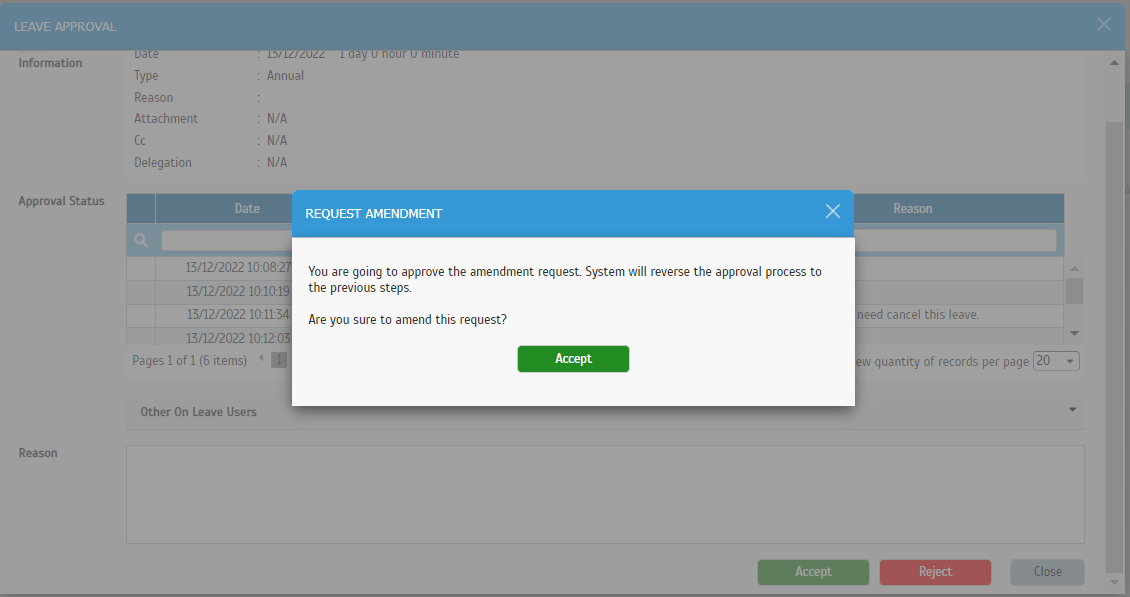
| g. Leave Approval Popup Approvers are able to state their reason and proceed with action to `Accept` or `Reject`. |
 |
| h. Leave Approval Popup - Accept Click `Accept` or `Reject` will lead to the next popup for confirmation. |
 |
| i. Email Notification Email notifications will be sent to the user and other Approver(s) (if available) when the Approver has accepted or rejected the request. Rejected – Receiver (User): |
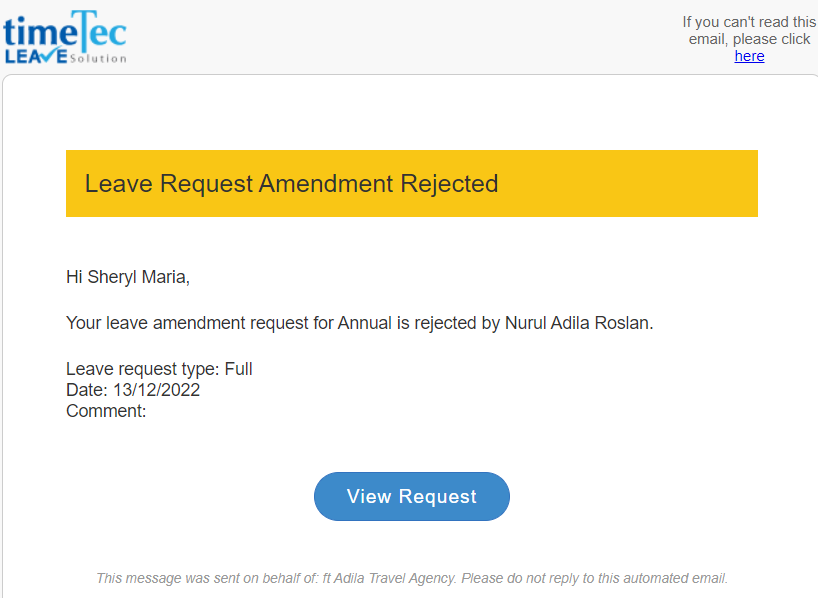 |
| Rejected – Receiver (Other Approvers): |
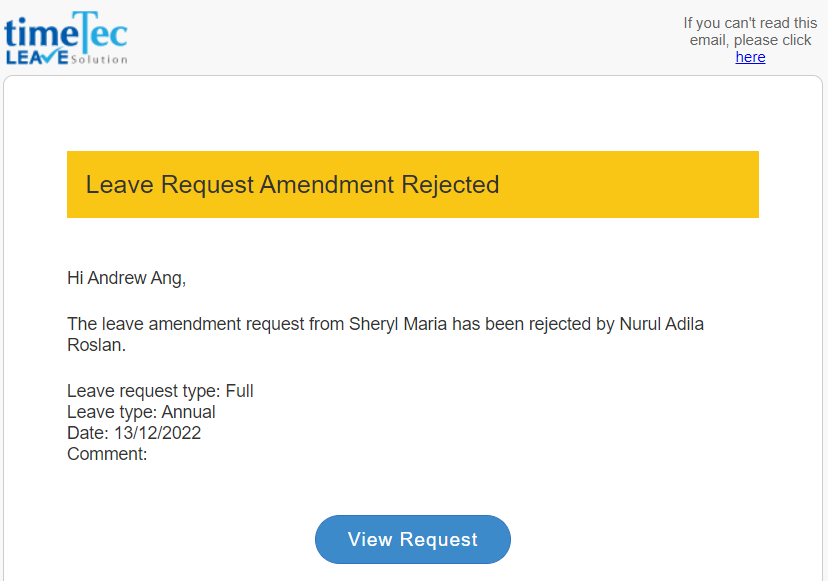 |
| Accepted – Receiver (User): |
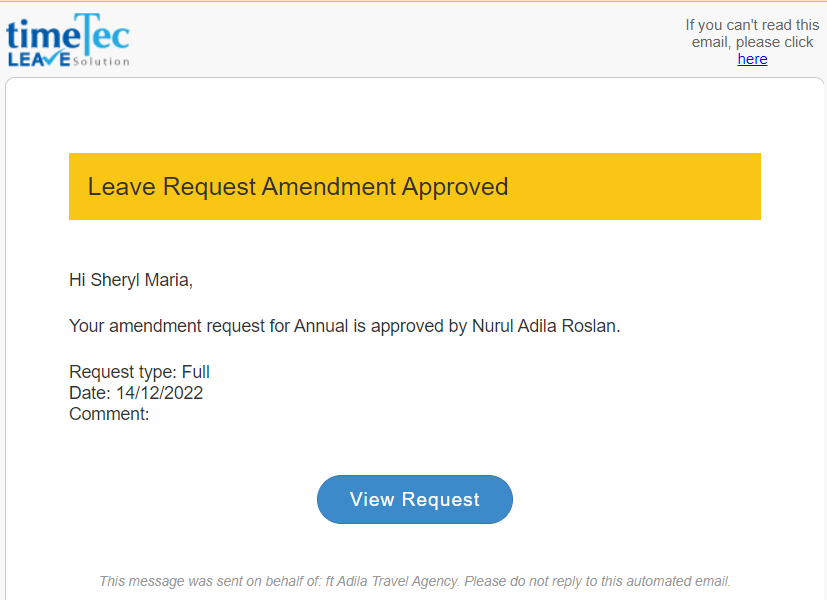 |
| Accepted – Receiver (Other Approvers): |
 |
| j. Leave Details If Approver `Reject` - Leave status will become `Approved` and the audit trail history will be displayed at leave details. User view: |
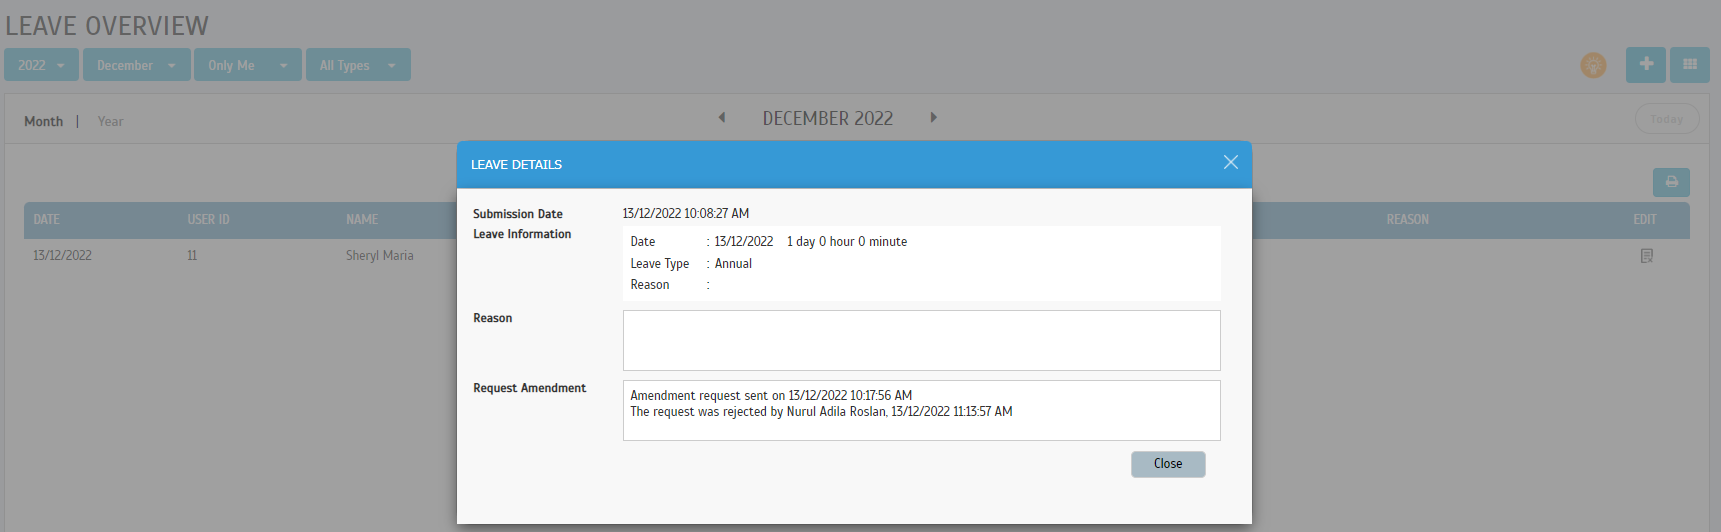 |
| Admin view: |
 |
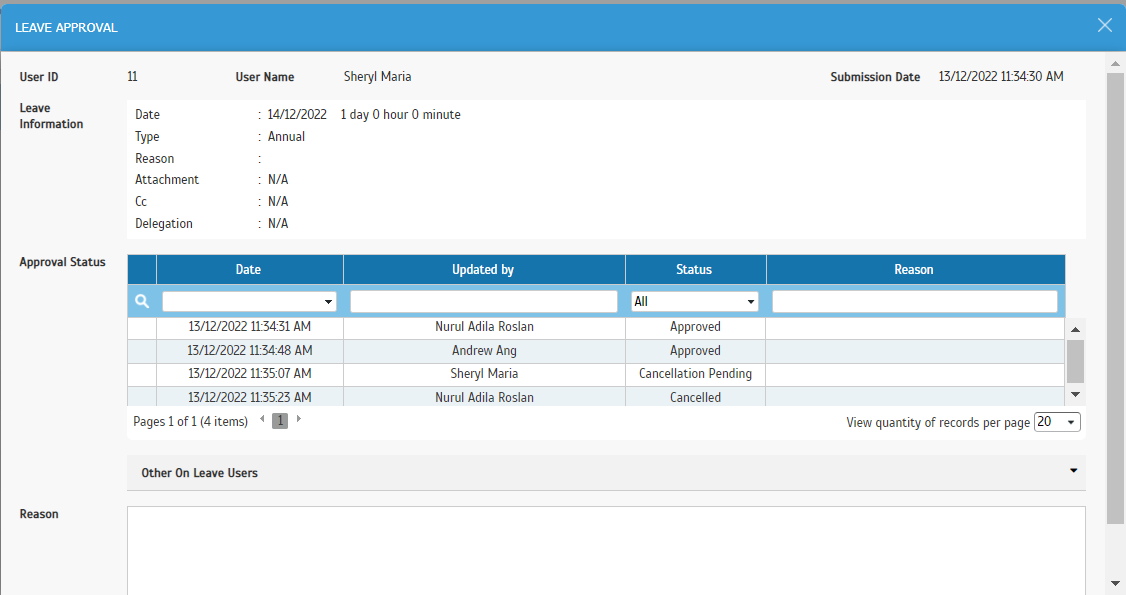
| If Approver `Accept` - Leave status will revert to `Request Cancelled`. The request amendment history will be hidden. |
 |
| Previous Issue: | ||||||||||||||
|
|
|
|
|||||||||||

