| Unveiling Exciting New Features |
 |
| Unveiling Exciting New Features |
|
| Web | Mobile |
 |
TimeTec Leave |
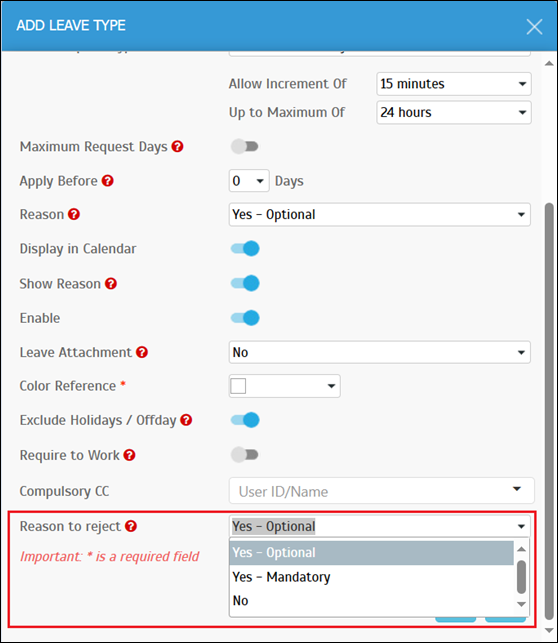
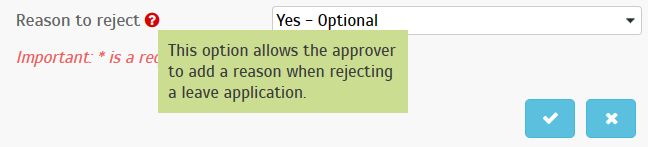
| This November, we’ve added an optional setting to make ‘reason’ as a mandatory input when approvers are rejecting a leave application. By default, the setting is ‘Yes – Optional’. To configure this for each leave type, go to Leave Settings > Leave Type, then choose either to add new or edit. a. Leave Type – Add Leave Type Popup Users are able to set ‘Reason to reject’ for the approval process when adding or editing a leave type. |
 |
| Tooltip |
 |
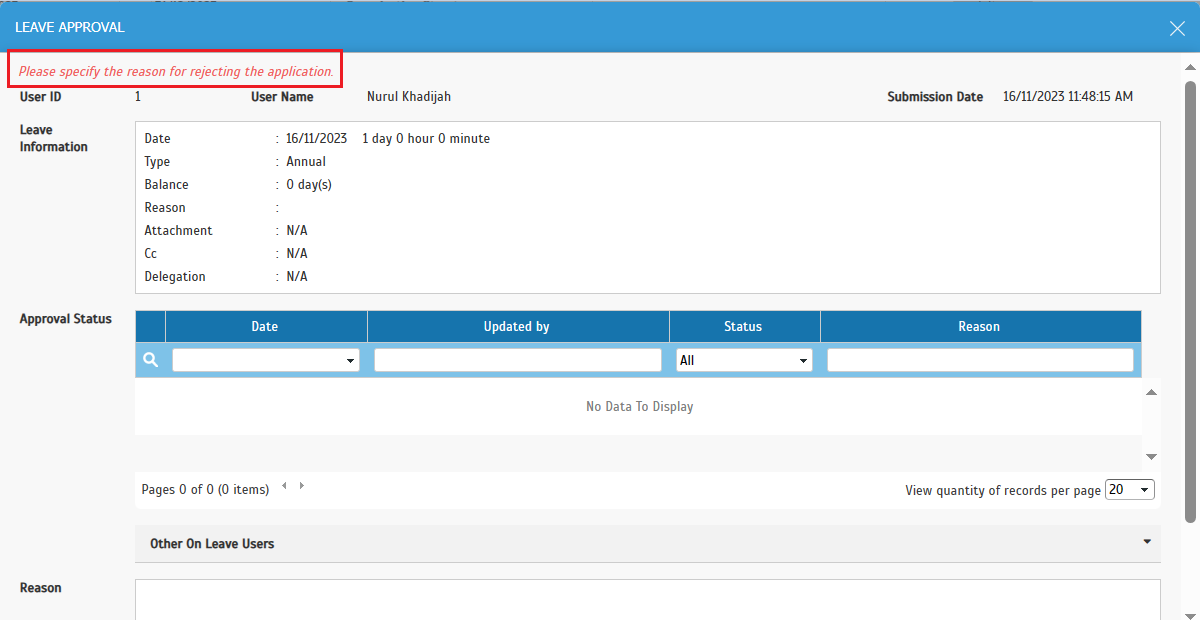
| b. Leave Approval – Approver Reason Follows ‘Reason to reject’ Setting i. An error message will be displayed when the approver does not write a reason (‘Reason to reject’ setting is Yes – Mandatory). |
 |
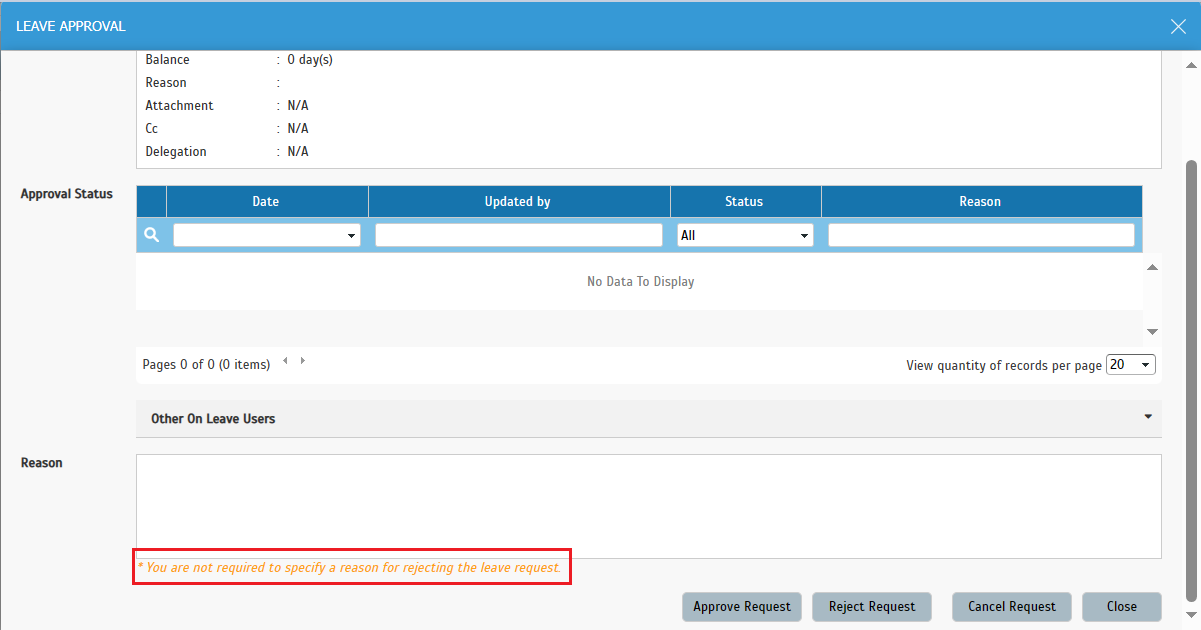
| ii. A note message will be displayed when the ‘Reason to reject’ setting is No. |
 |
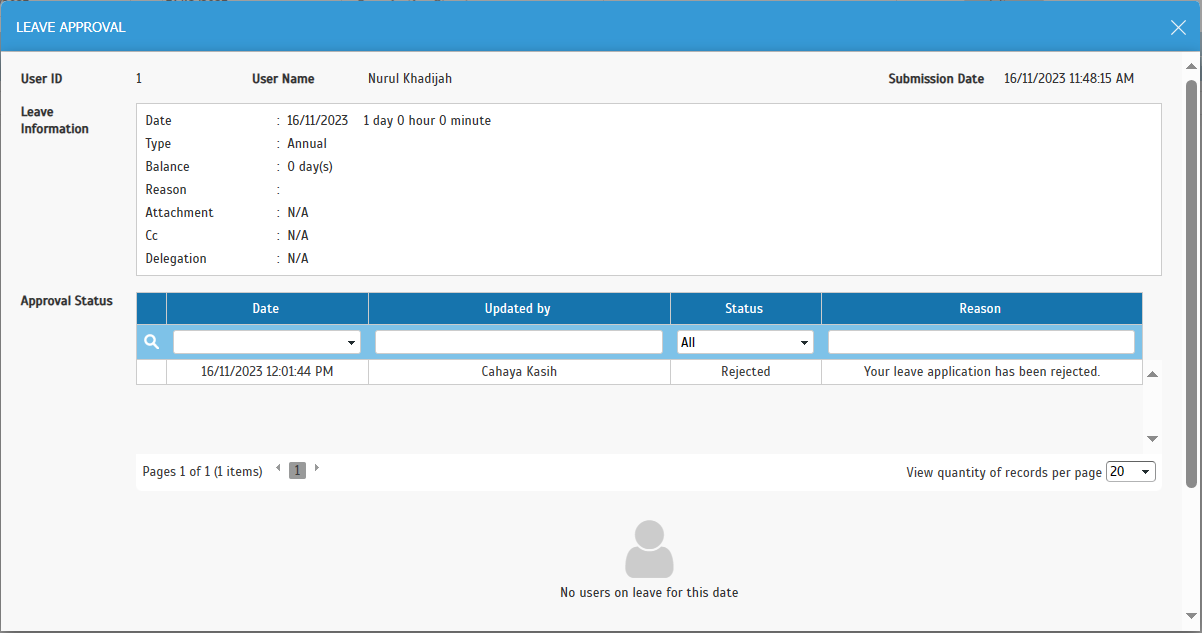
| iii. Display Rejected Message |
 |
 |
TimeTec Attendance |
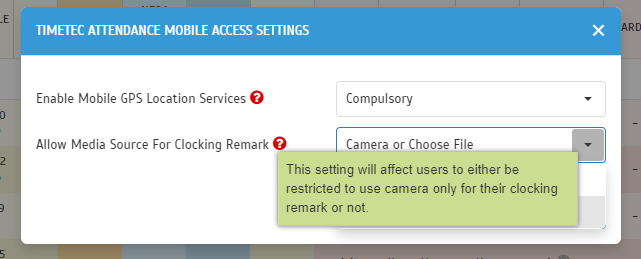
| To cater to mobile users who perform clocking through the TimeTec HR app, the mobile clocking feature allows users to enter Clocking remarks (with attachment) and also select recipients after clocking. In the latest release, GPS clocking function has been enhanced to support multiple captured photos and video attachments. Additionally, Admins can choose whether to only allow new attachments from the camera function or also allow submission from existing files. a. Device > Assign Users To Device – New Setting 'Allow Media Source For Clocking Remark' |
 |
 |
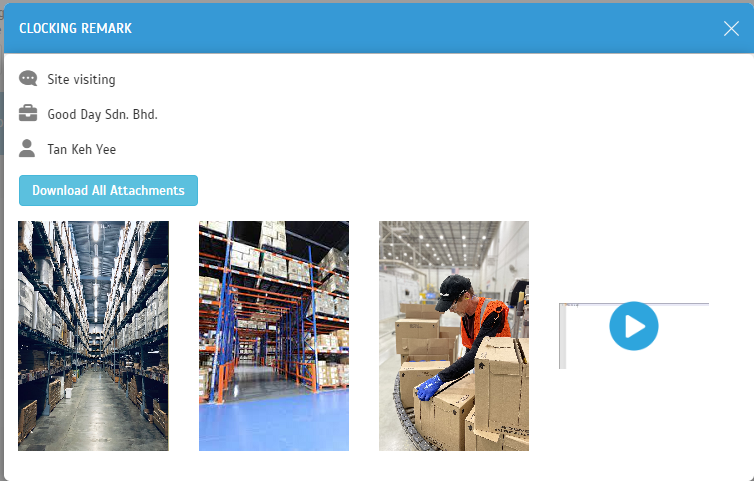
| b. Device > Data Audit List - Display of Multiple Clocking Remark Attachment |
 |
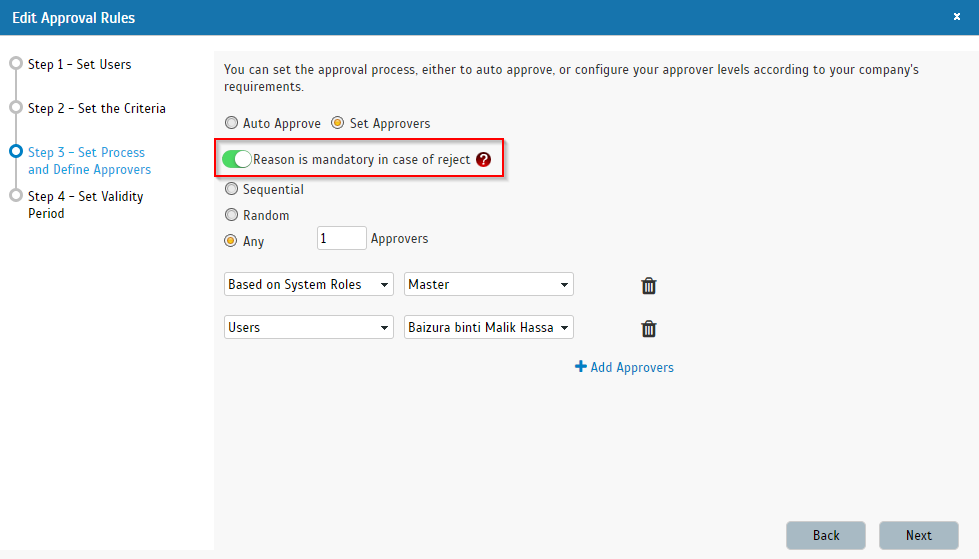
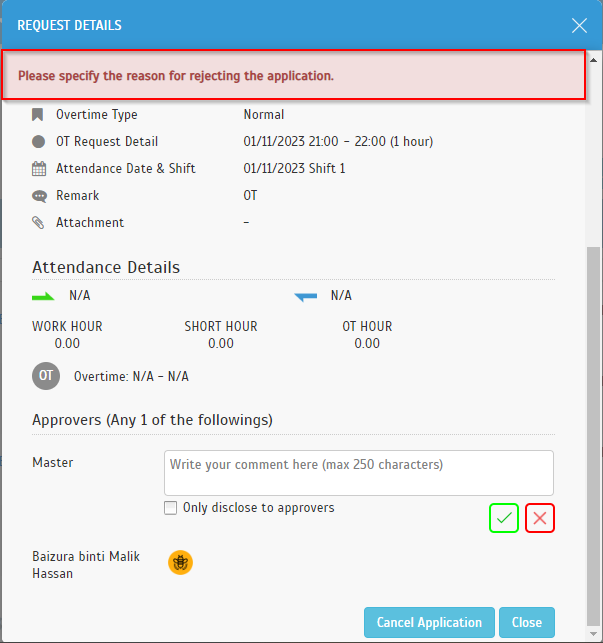
| In TimeTec TA, there is an Approval feature which enables Admins to set up certain rules for managing Overtime, Edit Attendance, Out of Area Clocking and Outstation requests. This setting is located at User > Manage Approval Rules. Once the rules are configured, assigned employees can then apply through the system and these requests will be submitted to their manager/Admin for approval. Following a customer’s request, we recently added an optional setting to make ‘reason’ as a mandatory input when approvers are rejecting a request. By default, the setting is disabled. To configure this for each approval rule, go to User > Manage Approval Rules, then choose either to add new or edit. At the popup, go to the tab ‘Step 3 - Set Process and Define Approvers’ > select ‘Set Approvers’ to access this setting. a. Manage Approval Rules – New Option 'Reason is mandatory in case of reject' |
 |
| b. Approval - Display Error Message ('Reason is mandatory in case of reject' Option is Enabled) |
 |
| Generally, when you need to customise the duty roster for individual users, for example update their respective leave days, edit the work schedules or perhaps change rest days, you are able to do so at Schedule > Customise User Duty Roster. This page was recently updated to display the schedule details (i.e. schedule code, schedule name and leave type/holiday/rest day) when your cursor hovers over any schedule code in the table. a. Customise User Duty Roster - Display Schedule Details on Hover |
 |
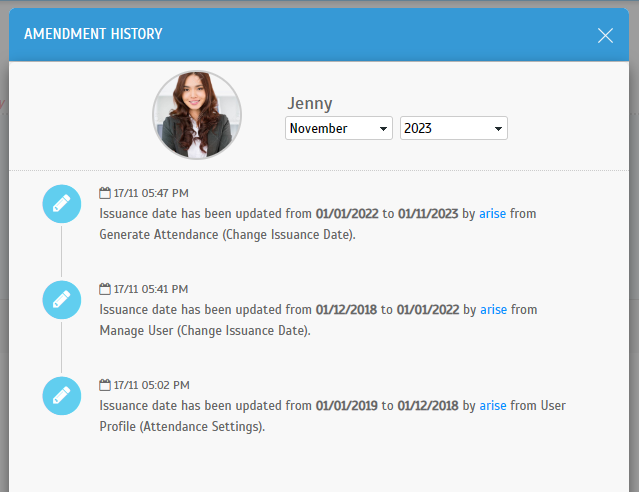
| Next up, we added amendment history when Admins edit the user's issuance date at the following pages: a. User Profile > Attendance Settings b. Manage User > Change Issuance Date c. Generate Attendance |
 |
| Previous Issue: October 2023 |